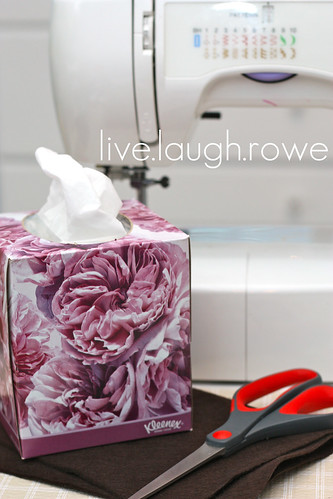
As many of you know, tissue box covers are pretty standard in the stores and typically meant for bathroom use. I’d like to keep a box of tissues in my guest room; however, I didn’t want to just place the boring box in the room. I also didn’t want to use a bathroom tissue box cover. Soooo, what to do??? Well, I put my creative juices to work — and after being inspired by the West Elm felt office collection (see below), I decided to make one of my own. The best part, it cost me under $1.00. Yay!!
 |
| photo credit : West Elm |
Here are the very limited supplies you will need: a box of tissues, two sheets of felt (in your color of choice), scissors, thread and a sewing machine.
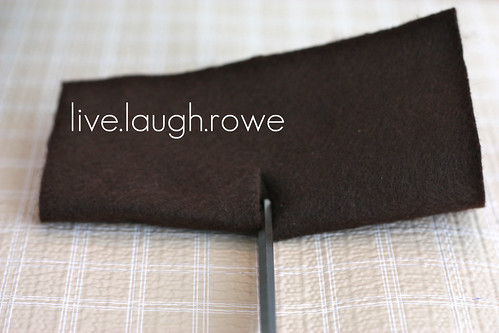
Place one piece of felt down horizontally and cut it in half, creating two pieces of felt.
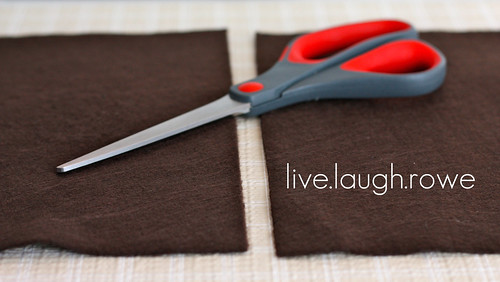
You’ll now want to cut those two pieces in half — creating four quarter pieces of felt. These four pieces will create the shell of the tissue box cover.
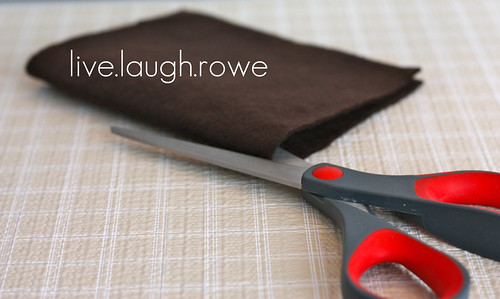
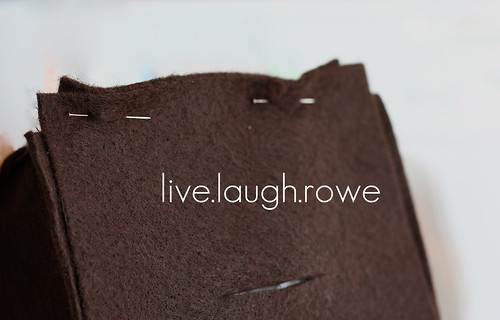
Take two of the quarter pieces and place on top of each other. Sew up one side, leaving a little less than a 1/4″ between stitch and edge of the felt.
Once you’ve sewn this first side, you’ll take another quarter piece and place on top of one of the other non-sewn edges and proceed with sewing it as you did in the step above. Continue this until all four sides are sewn and it’s in the shape of a box (shell of a box). Between sewing each side, I recommend a test fit to your tissue box {see pic below}. You may need to manipulate and stretch the felt a bit as necessary. This is to ensure that you can slip it over the box, once the top has been attached.
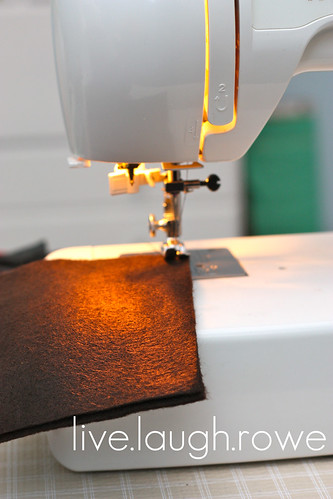
The second piece of felt will now need to be cut in half as you did in step one. The one half can be set aside as it will not be used. The other half will used to measure out your top piece for the tissue box. Set on top of your shell and measure or cut an approximate fit. If it’s a bit bigger, it’s not a huge deal, as you can trim off the excess after sewing it on (if necessary). Now before we sew the top to the shell, fold the top piece (that you just cut) in half and use your scissors to cute a slit approximately 1″ in length. This is where your tissues will slip through.
I pinned the top to the shell to ensure it kept it’s form as I sewed it to each side, removing the needles as I moved along. However, sew with your preferences in mind.
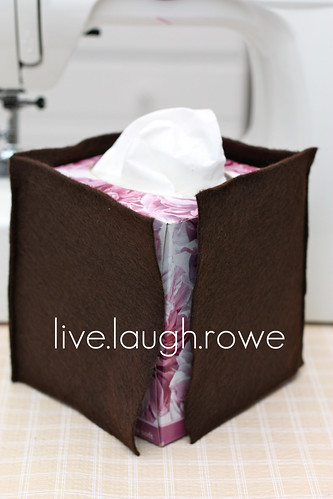
After all of these steps are completed — you’ll have yourself a unique felt tissue box cover that has a minimalist feel, yet felt never looked better! Here is my finished product.
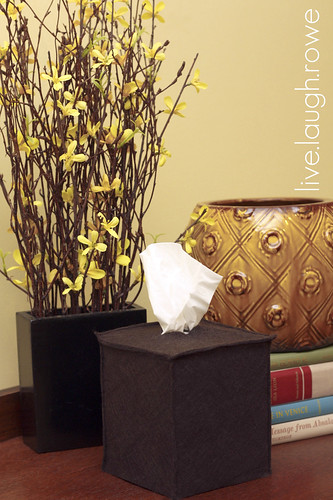 |
| Felt Tissue Box Cover — Fabulous! |
Looking for some more inspiration?
Check out these fabulous blogs I’ll be partying with this week!
Monday:
Making Monday Marvelous @ C.R.A.F.T
I made the world cuter today @Making the World Cuter
Just Something I Whipped Up @ The Girl Creative
Motivate Me Monday @ Keeping It Simple
Made By You Monday @ Skip to My Lou
Tuesday/Wednesday/Thursday:
Show Me What You Got @ Not JUST a Housewife
Inspiration Board {Tuesday}@ Carolyn’s Homework
Whims Wednesday @ My Girlish Whims
Create and Share Wednesday@ The Trendy Treehouse
Catch a Glimpse Thursday @ A Glimpse Inside
Share Awesomeness Thursdays @ The 36th Avenue
Friday/Saturday/Sunday:
Weekend Wrap Up @ Tatertots & Jello
Frugal Friday @ The Shabby Nest


Kris says
Kel – AWE to the SOME post! …and WOW on the photos!!!
Nikki@EverythingUndertheMoon says
This is cool. You did a great job! New follower here. Would love it you would stop by and share this at my linky party 🙂 http://everything-underthemoon.blogspot.com/2011/11/bedazzle-me-monday-8.html
Also, PRETTY PLEASE check out Random Acts of Kindness Week going on right now!! Would love to see you be a part of it! http://everything-underthemoon.blogspot.com/2011/11/kindness-and-thanksgiving.html
Stephen Rowe says
Hey Cutie! Great job on tissue box. I know the hard work you put in to ALL the projects you do and you rock! Martha Stewart meet Kelly.
Jamie says
Looks beautiful. Hope to see you at DIY Home Sweet Home. I'm also your newest follower. Cute blog.
Jamie
http://diyhshp.blogspot.com/
P.S. I have a linky every Monday. Would love you to stop by and link up.
Maria says
This is really nice! Tissue boxes never fit in with room decor, this is a great way to make sure they do! Nicely done!
Summer says
I love this! Why are tissue boxes so ugly? Great way to incorporate it into your decor!
Renewed Upon a Dream says
This turned out so nice! Great way to dress up the tissue 🙂 I neeeed to learn how to sew!
notyet100 says
Even I liv to work with felt 🙂