I’m excited to share another fun Valentine’s Day project with you. These adorable, fabulous and super simple Stitched Heart Valentine Tags. Lots of versatile uses too. I {love} the combination of the color red with kraft paper colored boxes/bags/tags/etc. It kinda makes my heart go pitter-patter. Alrighty, let’s get this valentine fun started.
 I thought I would approach this tutorial a little differently since it is super duper easy. I took one picture, numbering the steps and will break it down a bit more in text versus a gazillion other pictures. Different is good, right? This tutorial is all of four simple steps. Ready? Here we go.

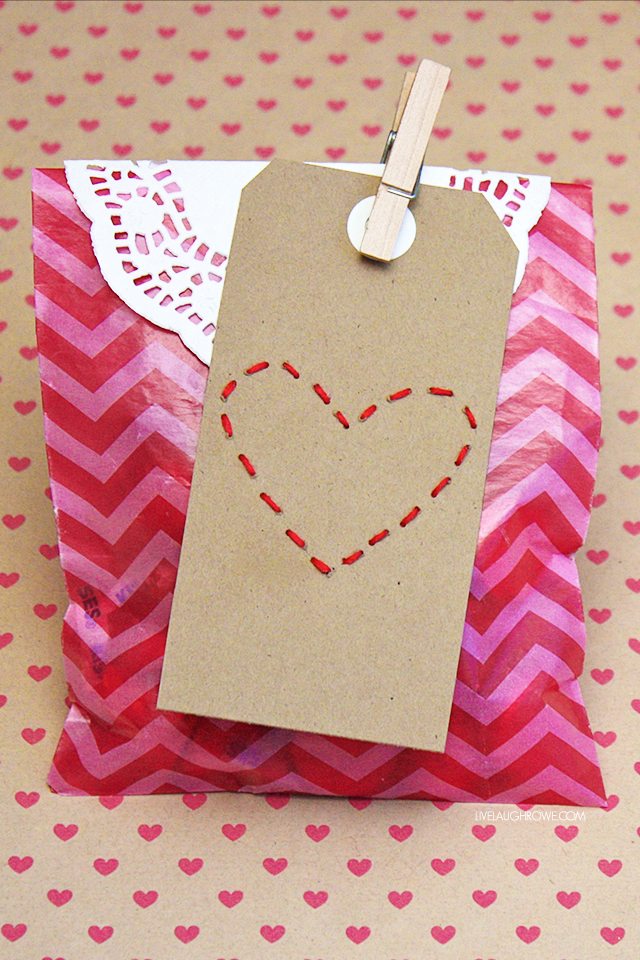
(1) SUPPLIES.
You’re going to want to grab some red embroidery floss (mine was #817), a needle, tags (kraft or manila), a heart stencil of choice, a pencil and eraser. I made mine with the kraft tags (which I decided to make myself). All you need is a tag template, kraft cardstock, a hole punch, reinforcement labels and scissors. My kraft labels measure 4.75″ x 2.375″, the size of a shipping tag. Easy peasy!
(2) TRACE HEART.
Take the heart template you’ve drawn and cut, or the stencil you might have on hand and trace it onto your tag in PENCIL (so you can erase the extra visible lines if you don’t stitch the entire perimeter of the heart shape).
(3) STITCH THE HEART.
You’ll then thread the embroidery floss onto your needle and stitch your heart. I chose not to do the entire heart, but that is another fabulous option. By placing a small not at the end of the threading, you’ll have a very clean look on the back as well. After I completed the stitched heart, I placed another small knot over the first knot. Snip the thread and your heart is complete.
(4) ERASE.
Depending on whether you stayed in the lines (giggle) or chose not to stitch the entire outline of the heart, some pencil lines might be visible, so you’ll gently erase them and have a sweet tag for use as an embellishment, book mark or valentine with a hand written note.

 So, what other fun pieces could you place a stitched heart on?
Happy Crafting! xo
 Be sure to visit with me here too:
Facebook | Instagram | Pinterest | Twitter | Google+


Meredith Hazel says
Oh, I LOVE these!! Pinning now and making later :o)
Claire @ A Little Claireification says
These are TOO cute Kelly! Pinning these too! 🙂
Claire
Kerryanne @ Shabby Art Boutique says
They are soooo sweet Kelly. Thanks.
Amanda says
Such a cute fun project!
mandy @ this girl's life says
So cute! Pinned this for later! 🙂
Gina says
Oh fun- I think this would be a great beginning sewing project for my girls. Super cute Kelly!
Stephen says
Your creativity ROCKS!!!
Amanda says
How cute are these!!
Kristine says
Love! Too cute and creative!!! 🙂
DesignedByBH says
I love these! They are super cute and seem easy enough to make. Thanks for sharing them!
Brenda @ a farmgirl's dabbles says
Super duper cute. {love}
Michaela Hamilton says
Love these! Need to make some this weekend! What a super cute idea! Thanks for sharing!
Michaela & Amy over at Making Life Whimsical
KC @ The Real Thing with the Coake Family says
So cute and so simple! Love!
Kathy Penney @ Sparkles And A Stove says
These are adorable Kelly! Stopping by from Cheerios & Lattes. Pinning!
Lyuba@willcookforsmiles says
Those are SO precious! I love it!
Samantha D says
Very cute – This would be a fun craft to try with older kids too.
Jessi @ Practically Functional says
Oh my goodness, these are too cute! And they look super simple. Pinning, and thanks for sharing this at Creativity Unleashed!
PartyPatisserie says
Your gift tags are just adorable Kelly and i would love if you’d share them at my link party!
Bonnie @ The Pin Junkie says
Thanks for sharing your stitched heart Valentine tags at The Pin Junkie. They were featured in today’s Valentine’s roundup. http://www.thepinjunkie.com/2014/01/valentines-day-crafts.html Please stop by to grab a featured button and don’t forget to join the party this evening! Hope to see you there!